
HOW TO TRANSLATE PLUGIN ON WORDPRESS?
In this post, we will guide you on how to translate plugin using the Loco Translate plugin which is built-in translation editor within WordPress admin.
Step 1: Install and activate the Loco Translate plugin
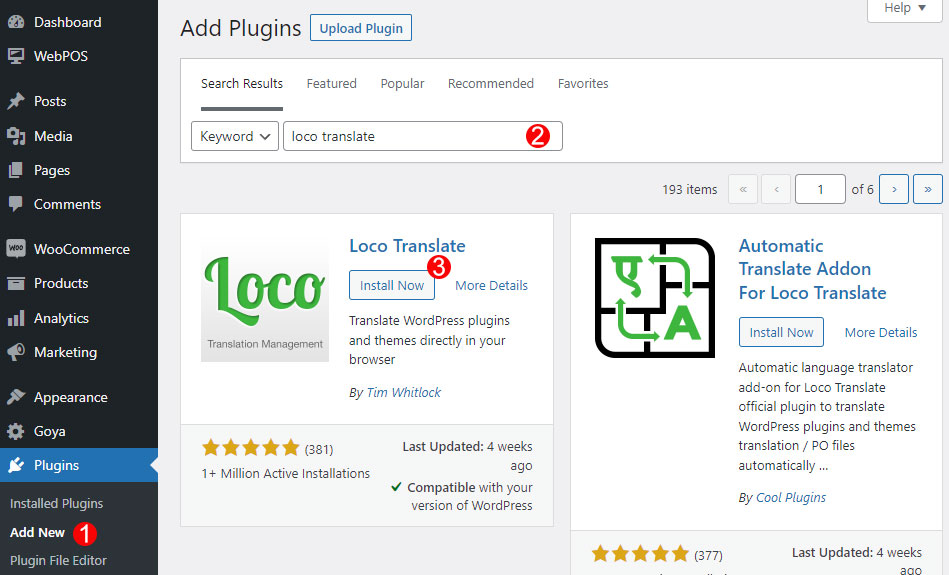
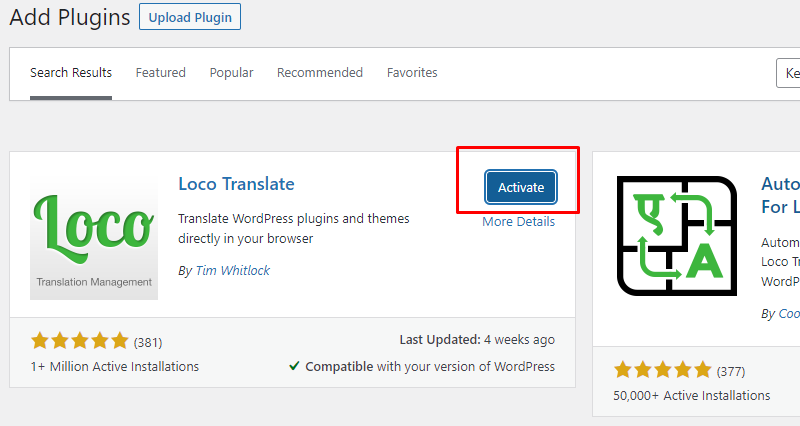
Go to Dashboard => Plugins => Add new, Search Loco=> Click Install now, then Activate.
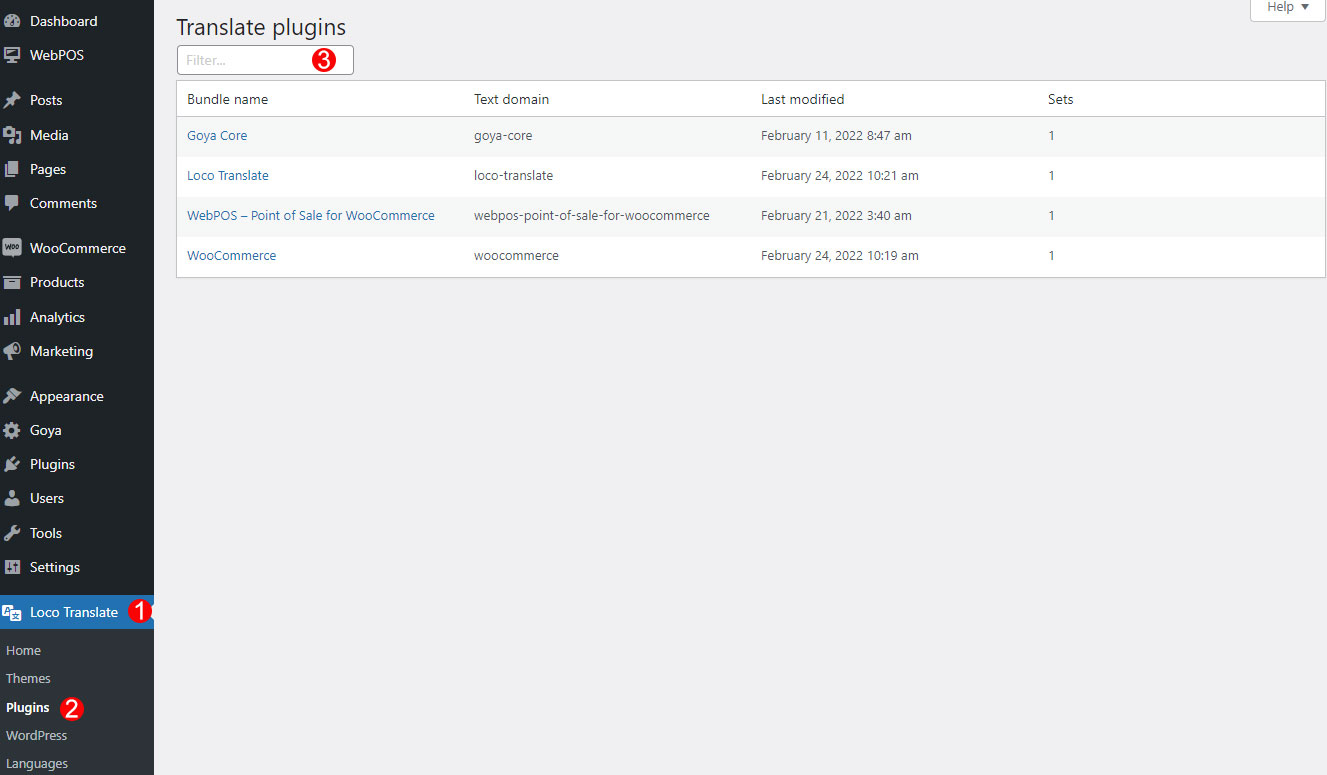
Step 2: After successfully activated, open Loco Translate > Plugins => Choose a plugin that you want to translate. Eg: WebPOS – Point of Sale for WooCommerce
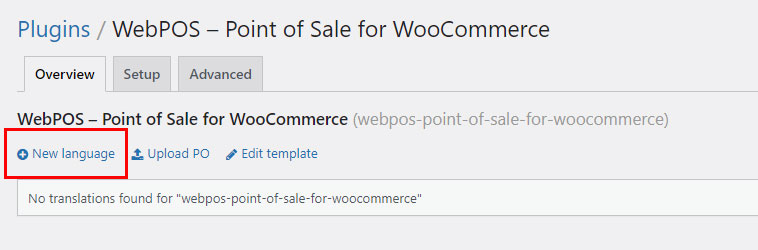
Step 3: Choose New Language
Step 4: Select your expected language in WordPress Language. Eg: English (United States) and the location of the translated data.
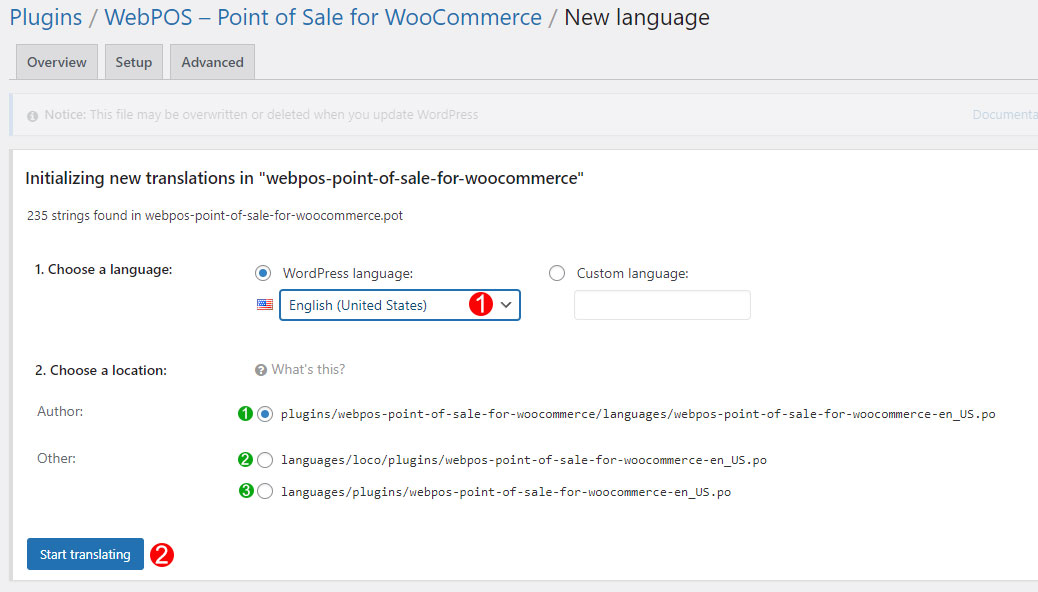
Note 1: If you choose the location:

 The translated data will be lost after you update the plugin.
 The translated data will be saved in the system so it will not be lost after you update the plugin.
Note 2: After translating, you can delete the Loco Translate plugin, and the translated data is still be saved if you choose to save the file in one of these 2 locations
Note 3: We highly recommend that you should save the translated data in this location
If you need any assistance, please create a new topic and we will give you support with 24 hours.