
You may get this error “404: Not found” when importing AliExpress products with Dropshipping and Fulfillment for AliExpress and WooCommerce.
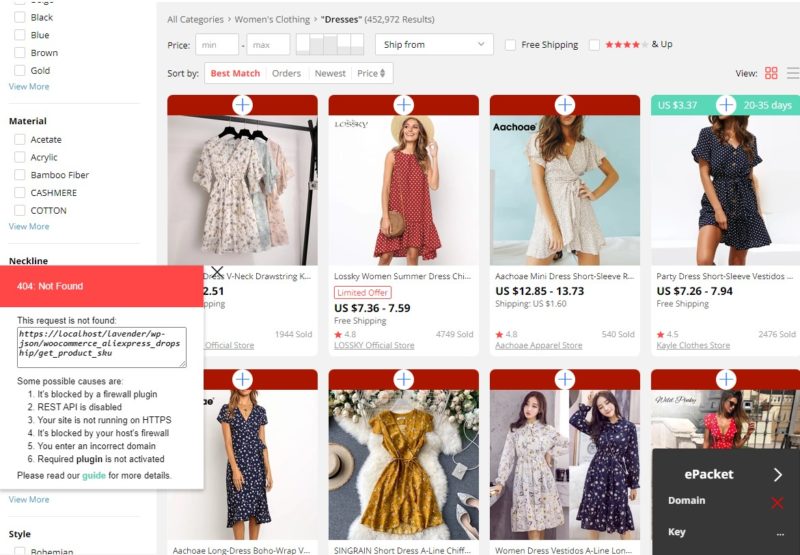
THE FIRST CAUSE: SECURITY PLUGINS ON YOUR WEBSITE.
This problem is frequently caused by your security plugins on your website. There are 2 popular and frequent security plugins that users use for their website and face with error notifications when they import products from AliExpress. The following guides help you to solve the above question on WP Cerber Security, Antispam & Malware Scan plugin and Wordfence Security plugin.
1. WP Cerber Security, Antispam & Malware Scan
If you are using WP Cerber Security, Antispam & Malware Scan plugin, follow these steps
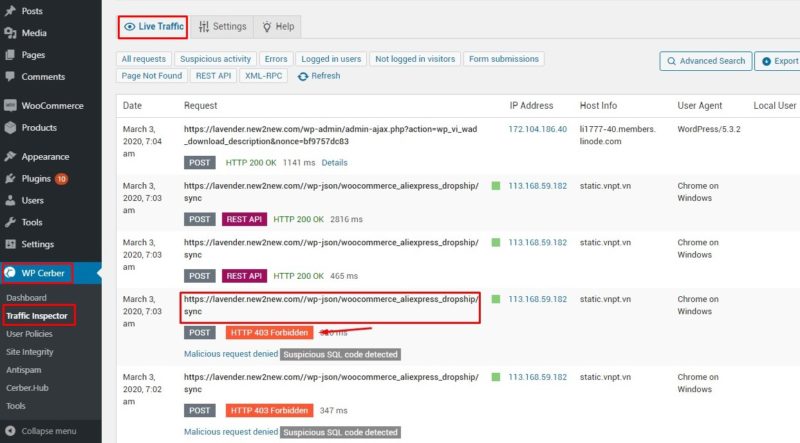
Step 1: Go to WP Cerber/ Traffic Inspector/ Live Traffic
You can see a list of requests including your requests to access Aliexpress importing pages that get the Forbidden errors.
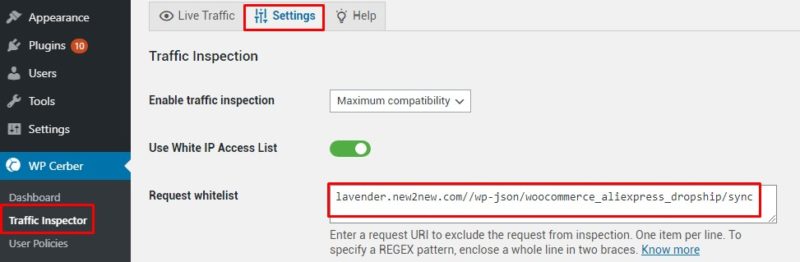
Step 2: Go to the Settings tab in Traffic Inspector to add your URL request to the request whitelist field.
- Enable use white IP Access List
- Add your URL request in the request whitelist field,
- Save the setting.
2. Wordfence Security.
If you are installing Wordfence Security, and stay “Enabled and Protecting” mode in the Web Application Firewall, just follow these steps:
Go to Wordfence / Firewall / Web Application Firewall. There are 2 ways to add your request URL on the whitelist.
The 1st way: Automatically add the request URL.
Step 1: Stay Web Application Firewall Status in Learning Mode.
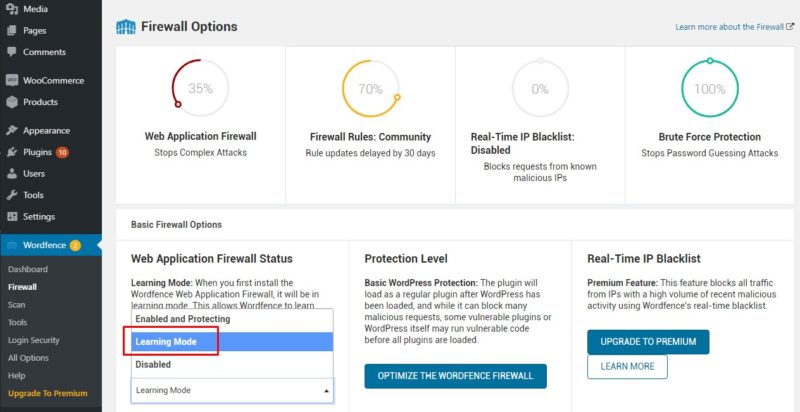
Step 2: Implement importing products from AliEpress.
Step 3: Turn back to stay Web Application Firewall Status in Enabled and protecting mode and save.
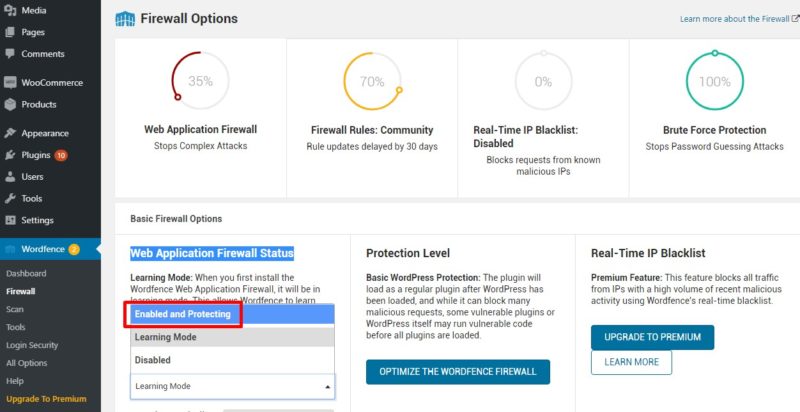
Step 4: Take a look at the whitelist URLs table, your recent request URL is whitelisted automatically.
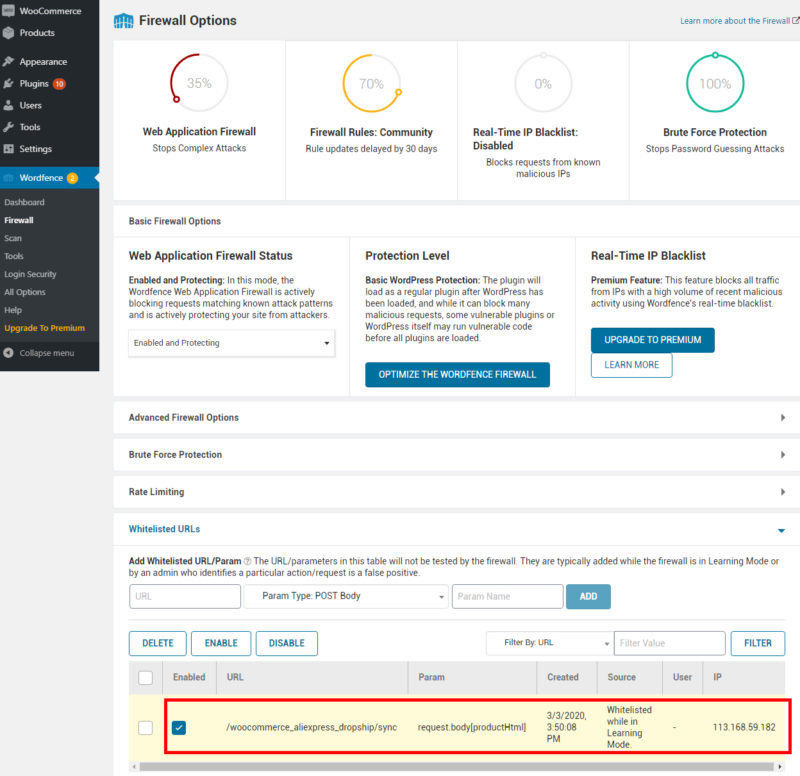
The 2nd way: Manually add the request URL to the whitelist.
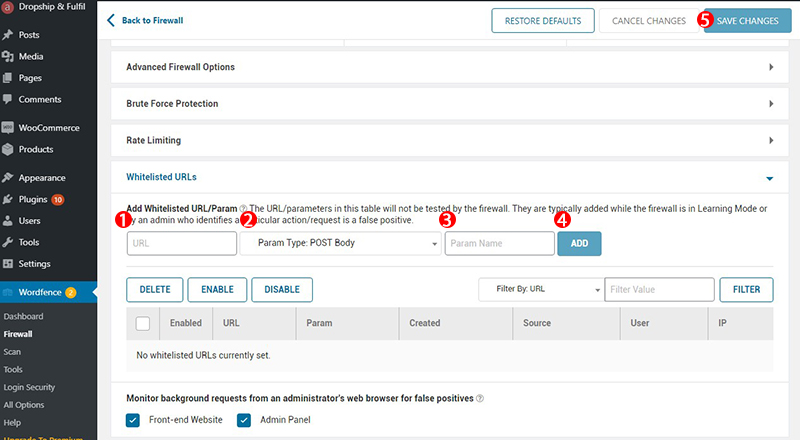
1. URL: add this URL
2. Param Type: stay POST Body /woocommerce_aliexpress_dropship/sync
3. Param Name: add this name productHtml
4. Add: to add this URL
5. Save.
** Note: With other FireWall plugins, try to find out how to whitelist your request URL in those FireWall plugins and import products from AliExpress normally.
THE SECOND CAUSE: THE REST API PROBLEM FOR SSL.
Most websites using Namecheap, Godaddy, or cPanel hosting that causes this problem. Their SSL does block the REST API, even you use Free SSL.
Our solution to this problem is to use Comodo free (30 days Free) to upload products. After uploading completed, you can get back to the previous SSL.
THE THIRD CAUSE: YOUR SITE IS NOT RUNNING ON HTTPS
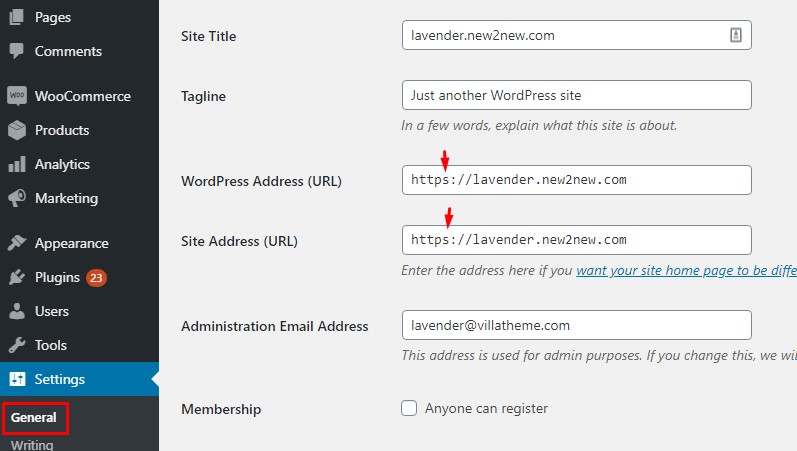
If your site is under this type: http://example.com, you must change your site URL.
From the Dashboard/ Settings, add “s” in the end of http in your URL address and save the settings.
THE FOURTH CAUSE: IT IS BLOCK BY YOUR HOST’S FIREWALL
You should contact your host provider and tell them that the request to {your_domain}/wp-json/woocommerce_aliexpress_dropship/sync is blocked because it contains product html content. They will help you solve this.
THE FIFTH CAUSE YOU ENTER AN INCORRECT DOMAIN
When you enter the wrong domain, the error notification will inform “Domain is not correct”

In this case, have a look again on the domain info and enter the correct one ( Take a look missing or redundant www. may also cause error)
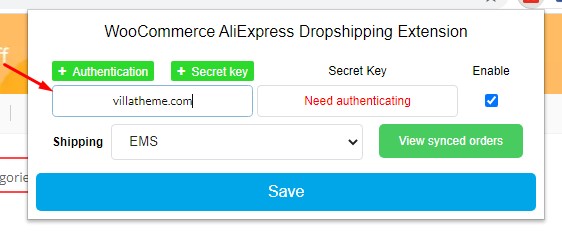
For example your domain like one of these below, you need check to enter the correct format:
villatheme.com
www.villatheme.com
https://villatheme.com/index.php
…
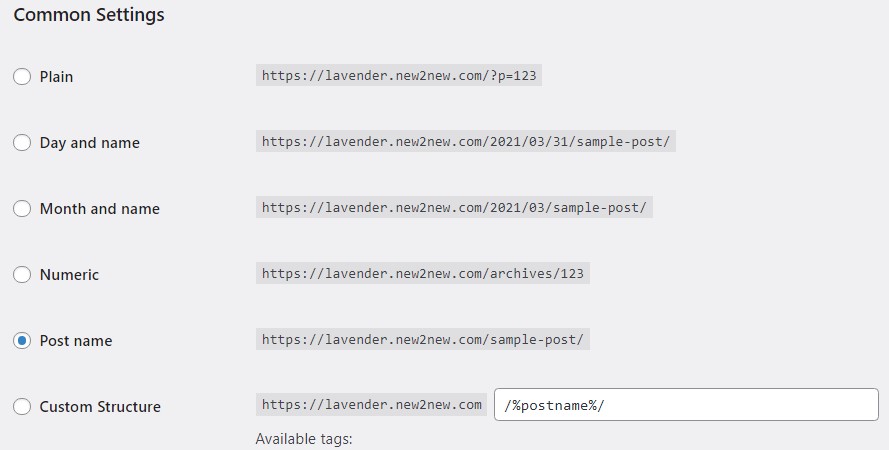
You can go to your Dashboard > Settings > Permalink > Common settings to check your domain format.
THE SIXTH CAUSE: REQUIRED PLUGIN NOT ACTIVATED
You can not import products while you have not activated. In this case, go to Plugins and activate “Dropshipping and Fulfillment for AliExpress and WooCommerce”
THE SEVENTH CAUSE: 404 ERROR ON ALL PAGES EXCEPT THE HOMEPAGE
Another different situation you may encounter when connecting the extension. The sign of this case is when you access your homepage, it works completely normally, but the other pages get 404 error.
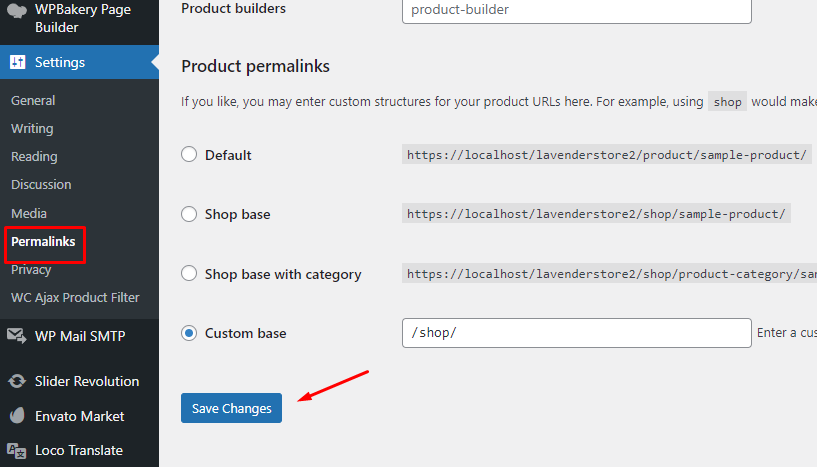
To troubleshoot this error, simply go to Dashboard > Settings > Permalinks, then click on the SAVE button, without CHANGING ANYTHING. After that, you can try to connect the extension again.
* PROBLEM AND SOLUTION FOR “DOMAIN IS NOT CORRECT” NOTIFICATION.
You are getting this notification “Domain is not correct” when connecting WooCommerce and Aliexpress through extension. Problem recognized with the Cloudflare firewall.
In this case, we can refer to the topic of Cloudflate about Customizing Cloudflare’s cache to solve this problem.
Overall, Cloudflare automatically caches several static file extensions unless:
- your origin web server sends certain Cache-Control headers for your content, or
- Cloudflare is instructed to cache additional content via a Cache Everything Page Rule.
Cache additional content at Cloudflare
Caching additional content at Cloudflare requires a Cache Everything Page Rule. Without creating a Cache Everything Page Rule, dynamic assets are never cached even if a public Cache-Control header is returned. When combined with an Edge Cache TTL > 0, Cache Everything removes cookies from the origin web server response.
Note: Do not use Cache Everything for admin sections of your website or pages that require a login. To prevent Cloudflare from caching specific URLs, create a Page Rule with Cache Level set to Bypass. Then, click the up/down arrows to drag that rule above the Cache Everything Page Rule in the dashboard.
To create a Cache Everything Page Rule, follow these steps:
1. Log in to your Cloudflare account.
2. Choose the appropriate domain.
3. Click the Page Rules app.
4. In the textbox under If the URL matches, create a URL pattern to differentiate your website’s static versus dynamic content.
5. Choose the Cache Level setting and then the Cache Everything submenu setting.
6. Click Save and Deploy.
7. Verify your resources are cached by checking the cache response returned by Cloudflare.
Cloudflare caches XML responses when using Cache Everything. By default, jquery’s getScript explicitly bypasses cache by appending a timestamp query string unless the behavior is disabled. For further details on how to adjust Cloudflare’s behavior in regards to query strings, refer to our article on Understanding Cloudflare Caching Level.
Source: Cloudflare – Customizing Cloudflare’s cache